

It’s HALLOWEEEEEEEEN month!! Hooray! To celebrate, I made this kawaii ghost graveyard cake to get everyone in the Halloween mood, hehe.

is chock full of awesome cake and cookie decorating supplies to help you get your trick-or-treat on! As soon as I saw the and the , a lightbulb went off – I wanted to make an extra cute ghost graveyard cake with floating ghostie sugar cookies! PLUS… I added Halloween coloured stripes, and used a grass piping tip to make the grassy green ground of a graveyard! I know Halloween cakes are often black, with blood ‘n stuff. But I wanted to keep it Rated G cuteness with this cake! Hey, it still has the goth factor though – little ghosties mixing and mingling above their gravestones.
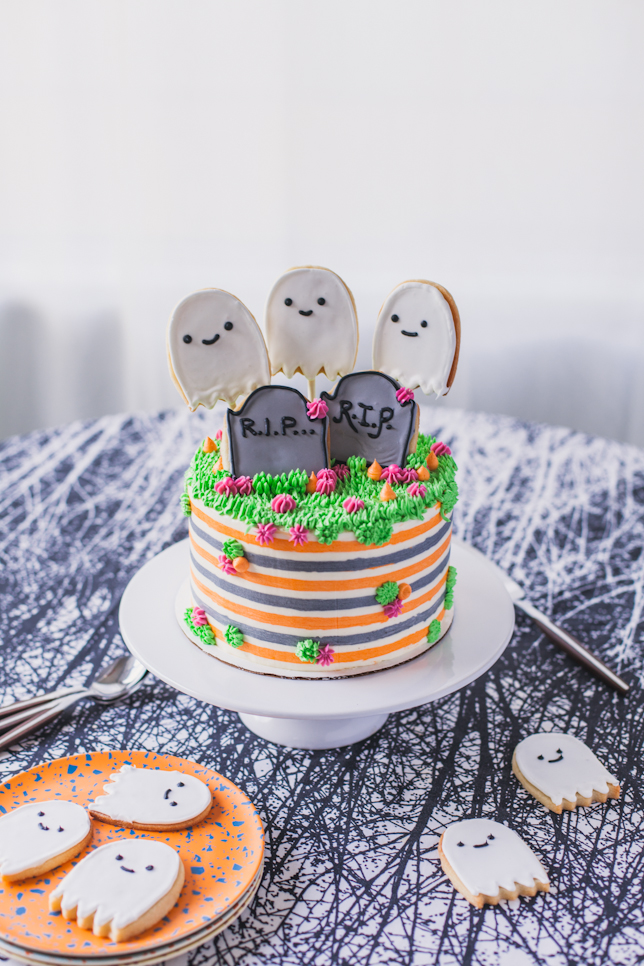
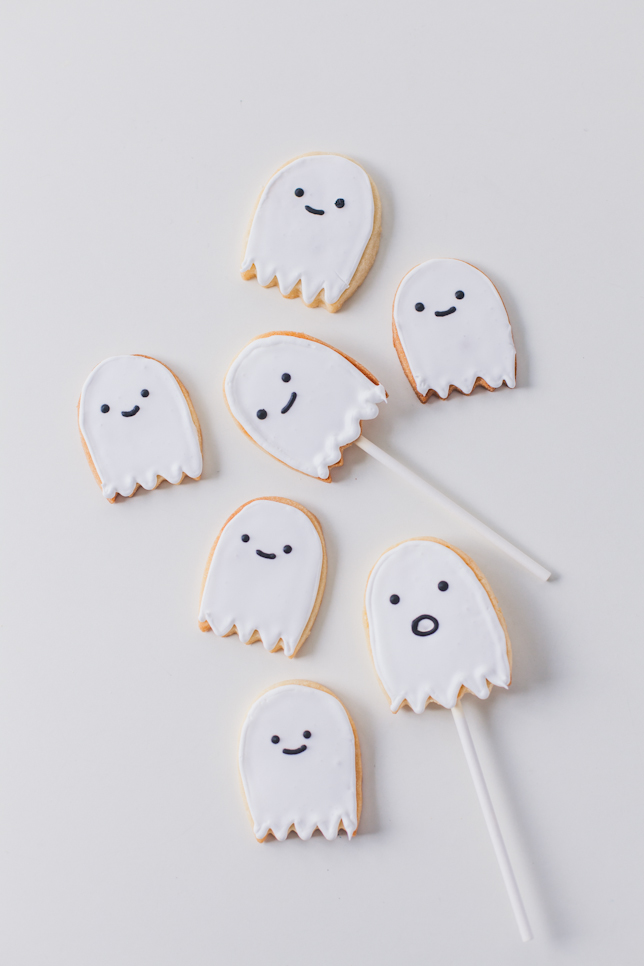
I also used to make cookie lollipops in order to anchor the cookies into the cake! Once you cut out the cookie dough into your desired shape, gently press the stick down into the cookie and bake as normal. You can also “glue” the cookie stick on once the cookies are baked and cooled using royal icing! To ice the cookies, I used to make a I always eyeball the consistency – you will want to have two different icing consistencies, one stiffer consistency for outlining the cookie, and one looser consistency for flooding the cookie. All you do is add tiny amounts of water until a looser consistency is achieved. TINY is the operative word here!

I baked my favourite chocolate cake recipe into four 7 x 2 inch round cake layers, then filled the cake with orange, grey and white vanilla buttercream to match the exterior of the cake. I used to colour my buttercream!

TIPS FOR YOUR SUGAR COOKIES:
1. Your sugar cookie dough should always be cold – most recipes call for it to be refrigerated at least a few hours before using. After you cut out your shapes, freeze the shapes on a parchment paper-lined baking sheet to firm up again for about 15-20 minutes before popping in the oven. This step will help the cookies keep their shape!
2. Royal icing dries out quickly! Always cover royal icing bowls and piping bags filed with royal icing with damp paper towels to keep it moist when you’re working! For piping outlines and for the ghost faces and tombstone lettering, I used a very small open circle tip – . To flood the icing, I used a spoon to dollop the looser icing into the centers of the cookies and I used a toothpick to spread the icing to the edges!
3. Once the cookies are iced, sometimes you want to POWER DRY them! I found that my oven was still somewhat warm (but cool enough that I could touch the racks) so I placed the cookies in the barely-warm oven to dry up a little quicker. I also put the oven light on too to try and dry them.

TIPS FOR BUTTERCREAM STRIPES:
1. After you’ve crumb-coated your cake, make sure you add a lot of buttercream to the second layer! You will be pulling away much of the buttercream with your but if you don’t have a thick enough layer on there, you won’t achieve smooth stripe lines. Once you’ve scraped the striped comb around your cake a few times, freeze your cake for 15 minutes to set.
2. Use piping bags fitted with small open circle tips to fill the coloured stripes. Scrape with a cake bench scraper, and then HEAT UP your bench scraper (place under hot water then dry it) and scrape a few mores times for a very smooth layer. Be careful not to scrape TOO deeply and too much, as you will eventually hit the crumb coat (this has happened to me MANY times!).
3. Practice! My first striped cake was a total fail, and I questioned my whole profession, haha. But, like any new technique, you gotta practice. So don’t be too hard on yourself. Watch VIDEOS of how to do it – here’s a good one, How To Create A Buttercream Striped Cake by Whitney of Sugar + Sparrow Cakes!

Thank youfor sponsoring this post! Although I’ve been compensated, all opinions are my own, and those who know and love Coco Cake Land know how much I love to use Wilton products in my cake decorating! , my friends! xo Lyndsay
gyoza*girl
love this Halloween cake with cookies! scarily cute!
Lyndsay // Coco Cake Land
thank you!!!