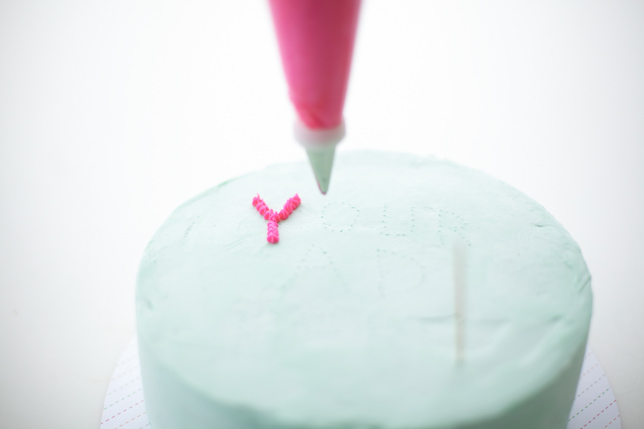
Gah I just love typography. Lettering on cakes is one of my favourite things, so I’m sharing a few mini tips on how to write on a cake! Of course you’ll want to start with a frosted, chilled cake that’s ready for piping. (Why chill the cake? So if you muck up the writing while piping, you can easily lift it away with an offset spatula or butter knife without wrecking the frosting underneath!) You’ll also need a toothpick and a piping bag fitted with a tiny open star or circle tip. I used Wilton #16, which is a teensy open star.

Using your toothpick, spell out what you want to write on your cake by inserting tiny holes in the buttercream. This acts as a guide that you can follow when piping out the letters.

Fill your piping bag with a contrasting colour – I tinted my buttercream fuchsia pink.
Following your toothpick-dotted lines, pipe out the little drop stars.
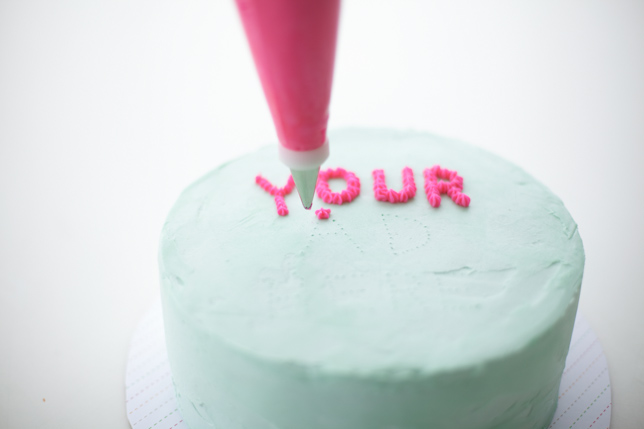
Keep on pipin’ til you’re all done!
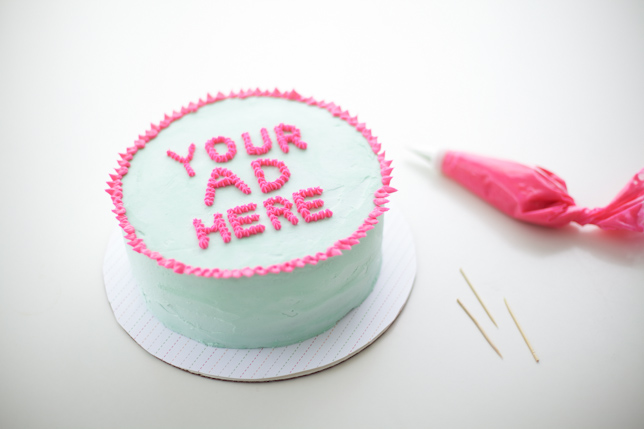
Swap out your drop star tip for a leaf tip and pipe little leaves around your cake’s border!
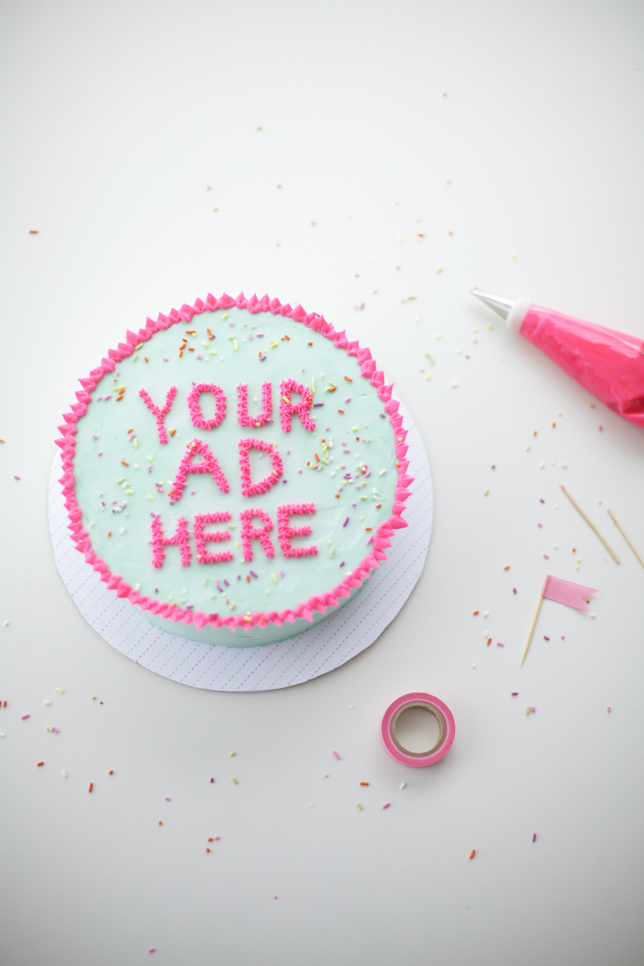
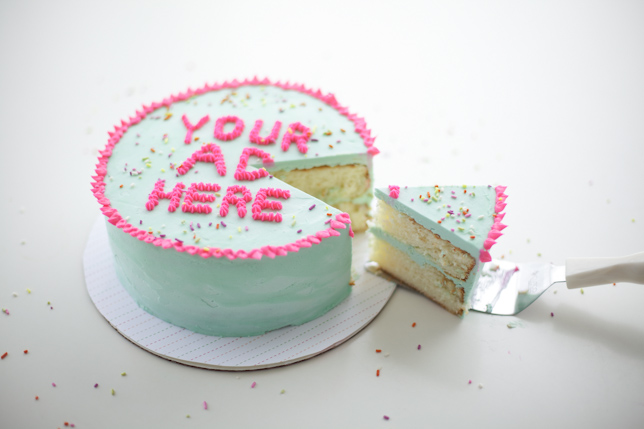
I can’t resist a dusting of sprinkles! Love these pastel cuties from India Tree.
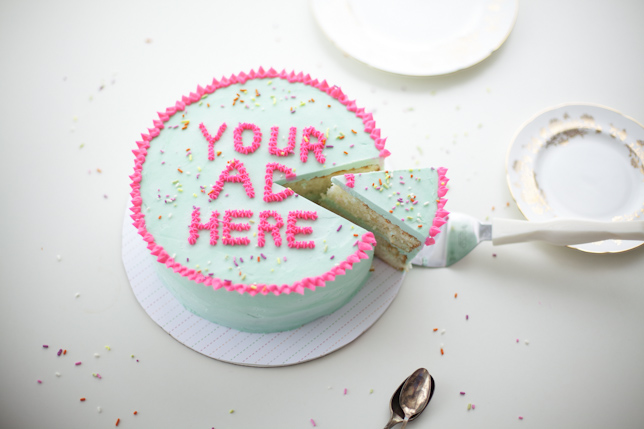
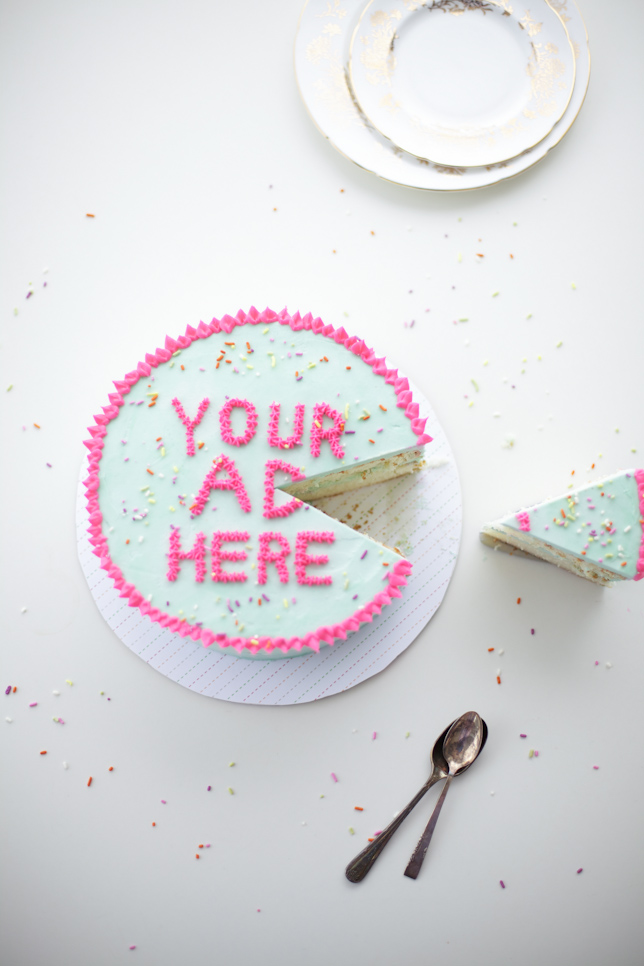
A little triangular wedge slice is just the cutest thing.
And you can really place “YOUR AD HERE”! Coco Cake Land is happily accepting sponsors on my shiny, fun new site! Visit my Advertise page for more info, or contact me about sponsored posts – so many fun, creative and cakey ideas await!
jan
Cute Lyndsay! Might have to buy a Poppytalk cake!
Lyndsay // Coco Cake Land
omg jan i would LOVE to make you one!! xo
renee shuman
such a great tutorial! i just bought a case of different piping tips and have been itching to give em a try. i’ll have to make a cake (or oooo a cookie cake!) and pipe something lovely in honor of this post. thanks for the instruction, i learned a lot!
Lyndsay // Coco Cake Land
aw thanks renee! stoked you enjoyed it!! can’t wait to see what you come up with, with your new piping kit! dang, piping is so FUN! xo
Emily
I absolutely love how this looks! I’ve tried to write on cakes before with icing and it was pretty much a failure, I can’t wait to try using your tips. thank you!
Lyndsay // Coco Cake Land
oh hooray! glad you like it – would love to see how your cake turns out! send me a pic! ^__^
heidi @ a week from thursday
Thanks for the tutorial. The sprinkles really make this shot and make the cake look so pretty.
Lyndsay // Coco Cake Land
aw thanks heidi! i love sprinkles!! they really do finish a party cake perfectly!
Jennifer McAllister-Nevins
I’m so excited to try this! We make a lot of cakes, and I’m never very steady with the lettering. Will definitely share this around!
Lyndsay // Coco Cake Land
hi jennifer! oh that’s awesome – let me know how it goes!! yes i just adore lettering but getting it on the cake can be a challenge sometimes! ^__^
Danielle
This definitely helps with letters! I’ve used cookie cutters for shapes like flowers and such as well! Just lightly press it down, remove and trace over with the frosting.
Lyndsay // Coco Cake Land
oh thank you danielle! oh that’s a great idea, too – cookie cutters in buttercream! thank you for sharing!
i.s.
this is so clever! x
http://www.vicariousLA.com
Lyndsay // Coco Cake Land
thank you very much! xo
Jane
Just love this cake typography tutorial – I usually just do cursive type writing but I’m definitely going to try this technique!
Michal
Really nice!
Thanks